


How to Install a Poly Plastic Fuel Tank – Step-by-Step Guide
Replacing your truck or Jeep’s rusty steel gas tank with a modern polyethylene (poly) tank is one of the smartest upgrades you can make for long-term fuel system performance. Poly tanks won’t corrode, they’re lightweight, and they’re designed for a direct fit. This guide walks you through the installation process step by step.
Why Choose a Polyethylene Gas Tank?
- ✔️ Rust-proof and corrosion-resistant
- ✔️ Lightweight for easier installation
- ✔️ Direct-fit for classic models like Ford F-Series, Chevy C/K, and Jeep CJ
- ✔️ Often comes with sending unit mounting points pre-installed
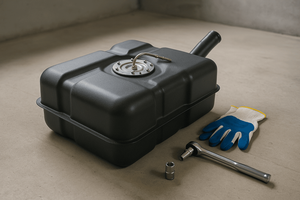
What You’ll Need
- Jack and jack stands or a lift
- Socket wrench set
- Fuel line disconnect tool
- New fuel tank straps (recommended)
- Safety glasses & gloves
Step-by-Step Installation Guide
- Disconnect the battery to prevent sparks near the fuel system.
- Drain any fuel from the old tank safely into a container.
- Support the tank with a jack and remove the mounting straps.
- Disconnect fuel lines, vent lines, and electrical connections (use a fuel line disconnect tool if needed).
- Lower and remove the old tank. Inspect the area for rust or damage.
- Install the sending unit into the new poly tank (if separate).
- Lift the new tank into place, reconnect lines, and secure with new straps.
- Double-check all connections before reconnecting the battery.
Final Checks
Before you start the engine, turn the key to the “ON” position without cranking to prime the system and check for leaks. If everything looks good, you're ready to go.
Recommended Products
Need help selecting the right tank? Contact our team or use our fitment filters to find a tank that matches your vehicle perfectly.
